Wednesday, 11 October 2023

Practicing Rules!

Of course there are no rules, other than just do it. But there are good ways to practice and not so good ways. My goal for practice time is that it will invariably lead to the development of sound playing and sound playing habits. And it has to be fun.
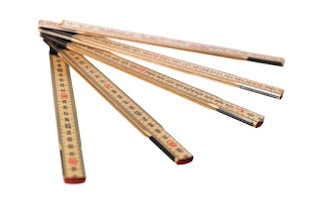
Folding ruler

Slow Down
Taking it too fast too soon is probably the number one reason for not making better progress. It’s a good idea to approach new material by playing it slowly ... in some cases, as slowly as you can stand it. This gives you lots of time to concentrate on what each limb is doing. Once you have a degree of control, go ahead and take it up to working speed, but be ready to slow it down again if you’re still struggling. Note that some patterns and rhythms may not be evident when the tempo is too slow. In this case, find a tempo where the musical content emerges, then work toward playing it slowly as well as at tempo.

Slow Down Mentally As Well
At its best, drumming can be a form of meditation, and this state of mind is well worth cultivating. Getting rid of distractions and mental clutter will help you understand the flow of time in a different way. Freddie Gruber would tell his students that they had “nowhere to go and all the time in the world to get there”. It was his way of saying lighten up, take it easy.

Slow Down Your Expectations
Practicing is an investment, and investments like to take their time. Focus on where you are, not where you think you should be. And, as with a financial investment, don’t look at the balance too often -- the ups and downs can be discouraging.

Relax
The great players all have one thing in common: They relax thoroughly when they play. Even when they're digging in, great players are relaxed. A good way to relax is to simply tell yourself to relax, perhaps focusing on one limb or muscle group at a time (1).

“The more relaxed you are, the better you are at everything” - Bill Murray

Focus
Mindful practice really pays off. A study conducted at Duke University of Texas at Austen (2) revealed that people who slow down and focus intensely on the material -- even for a short time -- make better progress than those who don’t. Learning and mastering require a lot of focus, and the more focus you apply, the faster you’ll progress. Also keep in mind that mindless practice is unproductive practice.

Watch
Watch your hands as you practice to see what they’re doing. Do your movements look smooth and relaxed or tense and jerky? Some drummers like to practice in front of a mirror to help refine their moves. I recommend studying the hands of the great players to see how they hold the sticks, how they position their instruments, how they move. Study their feet as well.

Listen
Always be aware of the sounds you’re making. Hear what you’re playing. Listen to all your different 'voices'. Even better is to hear it before you play it. Hear it in your mind, then hear it on the drums. Sometimes an exercise becomes more difficult when you change a single seemingly insignificant item, so be sure to move things around the set to see how different sounds can affect your playing.

Also Listen To Your Body
Your body is constantly giving you feedback on where your limbs are and what they’re doing. Feel the stick as it hits the snare; feel how your foot interacts with the pedal; feel your whole arm as you reach for a cymbal. This vital information will help you refine the way you use your limbs. I recommend this Thomas Lange exercise: Play a 4-way pattern and focus on one limb at a time, increasing and then decreasing its volume, and shift your attention from limb to limb.

KISS: Keep it Short and Simple
It’s better to thoroughly practice a small number of items rather than make a few passes at a lot of material. I like to work on a few well-focused exercises that build on a single skill, and I generally move them to all positions within the time and also to different instruments.

Play Music
Once you have the basic co-ordination under control, make it sound like music. Not all exercises will produce an infectious groove, but it’s worth a try. I like to play exercises to backing tracks. I then try to forget that it's an exercise and just play.

Have Fun
In all my years of teaching I’ve yet to encounter a student who functioned better when not happy. Research bears this out. People work, play and learn better if they’re enjoying the task at hand and when the task has some meaning for them. Know what you’re practicing, know why you’re practicing it, and be sure that it’s a fit for you personally, musically, emotionally, and spiritually.

And remember that the best way to get better at your instrument is to play with other people.

From my blog:

1. Just Relax! - https://drumyoda.blogspot.com/2016/09/just-relax.html

2. How To Turbo-Charge Your Practice Routine - https://drumyoda.blogspot.com/2018/07/turning-coal-into-diamonds-or-how-to.html

How to Practice Part 1 - http://drumyoda.blogspot.com/2014/11/how-to-practice-part-i.html

How to Practice Part 2 - http://drumyoda.blogspot.com/2014/11/how-to-practice-part-ii.html
Wednesday, 6 September 2023

You Better Slow Down

There are times when a song doesn't seem quite right. Everything may appear to be correct, but things just seem out of sorts. Perhaps the tempo was counted off too fast or too slow. But what if the tempo is correct and it still seems at odds with the feel or mood of the tune? The tune may seem a bit rushed no matter what? Maybe it lacks the energy that a faster tempo would provide. There are tricks you can use to help align the mood with the tune regardless of tempo.


OK, It Really Is Too Fast
It happens: somebody counted the tune off too fast (or too slow) and now you’re stuck with it. Correcting a tempo on the fly is technically easy but philosophically tricky. You can't arbitrarily change the tempo mid-song to 'fix' things. I sometimes try to adjust an ailing tempo without anyone noticing, which sometimes works. BTW, The worst thing you can do is stop and try again; better to just live with for now.

Play More Notes, or Fewer
The number of notes you play can have a big effect on mood. Creating space by playing fewer notes can make a tune seem more stable. For example, playing quarters on the hi-hat instead of eighths can help make a tune feel more relaxed, less frenetic. Or you can increase the energy level by filling up some of the space ... busy implies energy. Playing a 16th-note ride pattern rather than 8ths can help create a sense of movement. You can also increase or decrease the snare or bass drum work to bolster or lighten the feel.

How Does It Feel?
An easy way to change the mood is to play half as fast, or twice as fast. Actually, a double-time or half-time feel is what you're looking for. Try playing a double time swing ride to perk up slower rock tune. Or you can allude to a half time feel -- bass drum on 1, snare on 3 -- to simulate a more relaxed pace. 

Half Time? Double Time? How about both?
The ‘Bonham shuffle’ is a wonderful example of mixing and matching half and double time: the bass and snare play straight time and the hi-hat plays a double time feel (or vice versa). In this case, neither the half time nor the double time pattern would have worked. This trick can be found on a number of recordings.

Be Up Front About It ... Or Behind
Playing on top of or behind the beat can be tricky, but it can help increase or decrease the energy level. A technique I like to use is to work with just the snare and not be concerned about the other bits. I can place the back beat a little ahead or a little behind. That way I can micro-manage the energy with just the snare.

Conclusion
Fixing a nervous or lifeless tune is not always possible. Some tunes simply won't settle down or “get off the ground” no matter what you do.  Well, that's music for you!

Pick Your Targets

One thing that I always admired about Buddy Rich was the way he set up figures. He had a way of announcing and drawing attention to horn lines that was absolutely beautiful. It’s also good illustration of how important it is to know not only where you are, but where you’re going as well.

More Than Hitting The Shots
Orchestrating a setup means you have to know where you're headed and then work your way toward that goal. We're sometimes inclined to focus on what we're doing in the moment and may not always be aware of where we need to end up. If you're not paying attention to landing point, you might play something that ends awkwardly ... or worse.

Mentally Organize Your Physical Space
There’s a lot of movement required in drumming, and knowing where you're going physically is vital. If you set out to do a roundhouse fill, for example, you need to prepare your body to move all the way from one end of the set to the other. Visualize the movements as you go. Think about the body movements you need to make so you can 'see' where you need to go before you get there.

You're Always Going Somewhere
When you play the last note of a phrase, you should be targeting the downbeat of the next phrase (you don't need to emphasize it; just land on it perfectly and you'll be fine). When doing a fill, you need to keep your eye on where you're going to resolve the fill. Pick your target, keep your focus on it, and let it guide your playing every step of the way. And listen.

Turn-arounds/Transitions
Phrases begin and phrases end. You can add interest and 'escort' the music from one phrase to the next with what's called a turn-around. For example, in a 32-bar tune, there are four 8-bar phrases. At the end of each phrase, drummers will often do something interesting to wrap up the current phrase and set up the next one. These transitions can be a simple shot or a dynamic two-bar fill. More common, though, is something in between, perhaps change the beat slightly for that last bar or a subtle two-beat fill. This also reassures the band that you (and they) are in the right place.

Starting, Stopping, Changing Gears
Take any sticking, any pattern. Where does it begin and where does end?  If it's a two-beat pattern that starts on ’3', the landing point would be '1' of the next bar. Start thinking about that end point and then adapt your playing so you reach it reliably and consistently.

By all means concentrate on what you’re playing, but also know where your targets are and always aim for them.

Also see:  https://drumyoda.blogspot.com/2016/05/adaptive-anticipation-or-what-comes-next.html

Thursday, 20 July 2023

Are You Talking To Me?

We’ve all at one time or another been advised to "just listen” and we would be told the answer to whatever it is that’s is confusing us. Listen to the Mulligatawny soup you’re making or the plants in your vegetable patch or that batch of wine maturing in the basement and you'll discover what they're trying to tell you. It seems that anything can have this extraordinary communication skill, if only we were more adept as listening.

The problem, though, is that the people who give this advice are usually experts with lots of experience. They’ve learned how to listen and they know what to listen for, often to the point of instinctive behaviour. They’ve also, for the most part, forgotten what it’s like to not know these things. But it's not the art of listening that's driving things, as much as its interpretation. And knowing what to 'listen' for can have a big impact on  how much you can ‘hear’.

For my post on snare drum sounds, I thought back to what the drums 'told' me they could do. And I don't mind saying it took me a long time before I could hear all those sounds, to know what they meant and to figure out how to use them in my playing. What happens if I crank the snares tight or loosen them practically off? How do I get consistent sounds out of a drum? What happens when I tighten the snare head? What about the bottom head on a tom?

Cymbals also have lots to tell us. Where’s the sweet spot on your ride cymbal?  What happens when you hit it near the edge or when you lay your stick across the bow? What about undertones? Is the cymbal fast or slow? All these and more can be revealed by listening to the cymbal. With every stroke, it’s telling you where and how to hit and also where and how not to hit.

There’s only one way to discover all this: Just do it. It’s a simple matter of paying attention to sounds you’re producing plus lots of practice and experimentation. So don't just hit. Hit and listen, and see if the instrument can tell you how to get the best sounds from it.

Thursday, 29 June 2023

How to Build Your Drumming Cred

“Street cred” ... it's about as good as it gets. It means you've survived in the wild and garnered a goodly amount of experience and respect. The music business can be quite a jungle, and the best way to beat your path through it is to have supporters on the inside. By that I mean that your most basic goals are to show people that you know your stuff and are willing to take on the challenge and the responsibility, and for that you need credibility.


And just how do you develop this valuable cred? Well that's going to take some work.

1. Be Worthy
The first step is to become a worthwhile player. You need to have ALL the necessary skills and knowledge to tackle a gig. You also need to demonstrate that it's about the music and the ensemble. Like the old expression says, they won't care how much you know until they know how much you care.

3. Get Out
Get out to playing situations as often as you can. If you’re not out playing yourself, you should be out listening to other, preferably better, players, and not just drummers. There are lots of venues having open stage events. Go. Sit in. Act like a pro and meet as many people as you can. Ask for business cards. Hand out your own business card (Don’t have one? Tsk, tsk).

3. Stay Out
Once you've begun to build and nurture your ‘support network’, get involved with these people. It needn't be much ... an occasional phone call, text, email, or quick chat at the music store. Also make it out to the clubs to just hang and show that you want to support their work.

4. Show & Tell
Having something tangible can help. A published article or interview suggests you are someone to pay attention to. A teacher with a book is highly respected. Online videos are a great way to market your skills. Be sure to have ‘samples’ with you at all times. Anything that you can put into people’s hands increases the chances of them remembering you. So business card, CD, thumb drive filled with videos, actual press kit ... whatever works for you (and your budget).

5. You need an online presence
Get a website, a YouTube page, a social media campaign … they’re not optional these days. Keep in mind that these are powerful marketing tools when used wisely. What you post should be related to your music activities and of the highest quality you can manage. Keep personal views out as much as possible, and make sure your pages can be found easily. If you’ve written a book or had media attention, it’s OK to plug it.

6. Modesty is good, however …
You don’t want to brag or name drop, but you need to let people know that you’ve got something to offer. It isn’t hard. If they ask, you then have permission to disclose ("Since you ask …"). Otherwise, you can work it into the conversation, “Your guitar player reminds me of when I was playing with (insert famous name here).” Perhaps not overly tactful, but you needn’t be shy about mentioning your accomplishments and that you’re serious about your work and your career.

Thursday, 1 June 2023

Occam Was Onto Something

The philosophical and scientific principal known as Occam’s Razor is attributed to William of Ockham, a medieval monk who lived from about 1287 to 1347. He advocated the problem-solving principle that the simplest explanation is the best and therefore most appropriate. Aristotle, too, subscribed to the idea, and Ptolemy wrote: It is vain to do with more what can be done with fewer.


A Closer Shave
The ‘Razor’ is a metaphor for the act of cutting away the excess. It’s like the prescription for sculpting a horse: Just remove everything that doesn’t look like a horse. A good musical model is Latin music. It often calls for a number of drummers and rhythms to support the music, but when you remove all the ancillary bits, what you’re left with is the ‘Clave ’, a 2-bar, 5-note figure that is the backbone of all Latin music. Once you understand the clave, you can then build on it to produce something interesting.

K.I.A.S.A.P., B.N.S.  (Keep It As Simple As Possible, But No Simpler)
We’re all familiar the modernized version: Keep It Short & Simple. Good advice most of the time, but it’s the ancients’ belief that the best course of action is to always remove as much extraneous detail as possible to arrive at the core of the matter. A firm grasp of the fundamentals is the key to real understanding.

That’s too simple for me
We’re not aiming to keep it simple for the sake of keeping it simple. What we’re going for, instead, is to reduce the layers of complexity, the clutter, the added frippery -- in short, the noise -- that keeps us from discovering the underlying essence. This will allow us to construct a more solid foundation.

Micro Practice
We do ‘micro practice’ all the time. We work on a single thing: single strokes, double strokes, lines from Stick Control and the like. Why? Because it works. Reducing our focus to a single item reaps big rewards. When learning a new figure, I will often take a 2-beat or even a 1-beat section and work on it exclusively. Then, when I tackle the whole thing, I’ve got a good handle on each part.

Where’s the clave?
There’s a Simon Phillips video on Drumeo that confirms the clave theory. His band, Protocol, was working on one of Simon's compositions called Undeviginti. It’s a fairly basic composition, except that it’s in 19/8. He got a call from the keyboardist Otmaro Ruiz who simply said, “What’s the clave?” He knew that once he understood the essence -- the clave – he’d be off and running ... as was Simon.

The goal is not to shun or avoid complexity, but complexity will come more easily and be more solid if the underlying parts are fully understood.

Simon Phillips Interview on Drumeo:  https://youtu.be/prZZyLHLFbA
Skip to the clave reference:  https://youtu.be/prZZyLHLFbA?t=2335
For more on the clave, see: The Latin Clave Demystified


Monday, 8 May 2023

Glossary of Drum Strokes

I posted a summary of drum strokes some time ago. In the meantime, through observation, experimentation and reflection, I have massaged the list a bit and added a few more items (it’s rather long now). There are likely techniques here that you’ve not encountered before, and I invite you to try them all out and see what works for you.


Most of the motions apply to both matched and traditional grip, although traditional grip has a few tricks of its own. All strokes are executed with a first finger fulcrum. 

"Always start basic and you’ll never go wrong. After you have control of your instrument,  you can do whatever you wish" - Papa Jo Jones

Simple Strokes

Down Stroke
This is a one-way stroke that starts at the top and finishes at the bottom. The key is to stop the stick after striking so the tip remains 1 to 2 inches (25-50 mm) from the instrument surface. The focus is on controlling the rebound so the stick is ideally positioned for a lighter stroke.

Up Stroke/Pull-Out
This stroke begins with the stick close to the drum or cymbal surface. After 'pulling' a note from the Down position, the stick is then lifted to a higher position to facilitate a stronger stroke. 

Whipping Stroke/Gladstone Stroke
This technique delivers maximum power. Begin in the down position. Lift the stick from the wrist letting the tip fall down. Then quickly whip the stick up and then down in a wave-like motion. Note that the stroke can be a Down Stroke or a Free Stroke.

Full Strokes

Free Stroke
The full down-and-up stroke begins at the top of your range and, after striking, returns to the starting point using only the rebound -- the hand simply follows the motion of the stick. The grip should remain loose and no effort is needed to get the stick back up. The Free Stroke delivers excellent speed and power, and should be your ‘go to’ stroke. The name acknowledges the tension-free nature of the stroke when done correctly. Also called Down-Up Stroke, Open Stroke, Full Stroke, Legato Stroke, and a few others.

Half Stroke
A Half Stroke is simply a Free Stroke starting at and returning to a lower height.

Bounce Stroke
This is a lighter Free Stroke using mainly the wrists and fingers. Bounce strokes are an efficient way to play quick multiple strokes.

Finger Stroke
This Free Stroke is made by keeping the hand somewhat fixed and bouncing the stick using just the fingers. Finger control can be applied to most techniques.

Wrist Stroke
This stroke uses mainly the wrists with little or no finger and arm action. The stick is gripped more firmly and is pulled up after a stroke rather than relying on rebound. Wrist strokes are excellent for volume and can provide a respectable amount of speed.

Piston Stroke
This is a Wrist Stroke that draws on the forearm for added power. The action is pushing down and pulling up. While this is a very powerful stroke, it puts a lot of stress on the wrists and forearms.

Combined Strokes

“Moeller Method” (1)
Named after rudimental drummer Sanford “Gus” Moeller, this is a two-part stroke that provides both power and speed. Begin with a Down Stroke, ensuring that the stick tip remains close to the striking surface. Then execute an Up Stroke, and return the stick to the start position. So, a Down Stroke followed by an Up Stroke. This action is ideal for playing 'diddles' and also for ride cymbal work

Bailey Stroke
This stroke is similar to Moeller except that instead of an Up Stroke, you simply drop the tip of the stick to the surface as you lift the stick. After a Down Stroke, simply relax the hand and let the tip fall as you begin to lift the stick. Some refer to this as a 'free note' as you get an extra note with no additional effort. The technique is often used by jazz drummers when playing a cymbal ride

Push-Pull
Begin your stroke in the Up position and do a Down Stroke but keep the hand and fingers very loose and let the stick fly up. Then quickly close your hand to execute a second stroke as you lift the stick for the next Down Stroke. This is great for speed and articulation, and also helps to lock in the pulse.

The Pump
The Pump is a logical extension of the Push-Pull. It’s executed by moving mainly from the forearm and allowing the stick to bounce between the fingers and the palm. The fingers only have to move a little to facilitate this action. As your speed increases, the amount of motion must decrease. This pumping action is ideal for playing sustained notes as in a cymbal ride pattern.

Full Gallop
The movement here is the exact opposite of the Push-Pull. The stick is pushed forward on the down beat and then pulled back on the up beat. Think of the thumb as pushing the stick forward and then pulling it back. This is an excellent technique for fast shuffles. (The technique looks like riding a horse when done with both hands. Other names under consideration include Pull-Push, Forth & Back, Thrust & Parry.)

Multiple Strokes

Dribble Strokes
This is a series of low Bounce or Finger Strokes that resembles dribbling a ball.

Jim Chapin's Triplets (2)
With a relaxed hand, begin with a throwing motion and allow the stick to rebound half-way or less. Next comes a Bounce Stroke using just the fingers. Finally, tap the head as you begin to lift the stick. So: Down Stroke/Bounce/Up Stroke. Triplets are a very efficient way to play multiple strokes. Note that you can add more Bounce Strokes in the middle: Down/Bounce/Bounce/Bounce/Up.

Tony Williams “Stutter Stroke”
This technique is mainly for playing a fast swing rhythm on a ride cymbal. The motion is almost 100% finger work -- a sort of ‘twitch’ action -- with the arm remaining fairly steady. For a right-handed player, start the stroke slightly to the left and move to the right while playing 3 quick strokes. The motion produces a sound similar to ‘Ta-da-Dum’, which can be interpreted as ‘&a-1’ which, in Cut time, gives us And-uh-1 And-uh-3.

Traditional Grip

"Buddy's Secret Weapon"
This one applies to the Traditional left hand grip and enables substantial speed by controlling the stick between the fulcrum and the first finger. A stroke is made with the wrist, and the first finger catches it on the rebound and executes a second stroke. The third finger helps set up the next stroke.

Piano Strokes
Some traditional grip players will turn the hand over, putting the first two fingers on top of the stick. Strokes can then be made with either finger, or both together. Some drummers like this variation for brush work.

Two Finger Roll
This technique is actually done with the thumb and forefinger of the left hand, and can be used to play singles strokes, double strokes and more. The thumb and first finger simply take turns throwing the stick down. The technique can also be executed with the first and second fingers and requires very good control and rebound.


(1) At one time there was a video on YouTube of an old-time drummer (possibly Moeller himself) demonstrating the Moeller Method. I have not been able to find this video since. I’ve described Moeller based on my understanding of the descriptions and photos in the “Moeller Book” as well as that video.
 
(2) In an on-line video, Jim Chapin gives a good account of his studies with Sanford Moeller and the influence it had on his technique: https://youtu.be/7yNb-kUPwMI

Drum Set Rudiments Part 2: Technique

{See  Drum Set Rudiments Part 1  for 'soft skills') Some drummers seem to have an obsession with technique. Others eschew the who...